How to paint pumpkins for Halloween – 5 steps for success
How to paint pumpkins for kids, how to paint pumpkins for halloween ndash 5 steps of problem, how to screenshot on windows, how to paint furniture, how to paint pumpkins for halloween ndash mdash, how to paint pumpkins for halloween ndash 5 steps of writing, how to draw, how to change yahoo to google, how to download youtube videos, how to paint rocks, how to paint pumpkins for halloween ndash 5 steps of project, how to paint pumpkin for halloween, how to make google my search engine.
More of us want to know how to paint pumpkins to take our Halloween displays to the next quiet – without necessarily getting out the carving knife. Sure a classic jack o'lantern will always look the part on this Popular holiday of ours but, if you're eager to branch out and try something new, paint could be your answer.
Easy and not overly messy, recreating different painted pumpkin ideas and looks is a simple craft that the whole family can get Eager with. Gourds have naturally quirky shapes so even if you were to paint yours in one stationary color, you'd still end up with a killer end. However you want to paint your pumpkins this year, there are just a few steps to behind to ensure you get pro results.
How to paint pumpkins
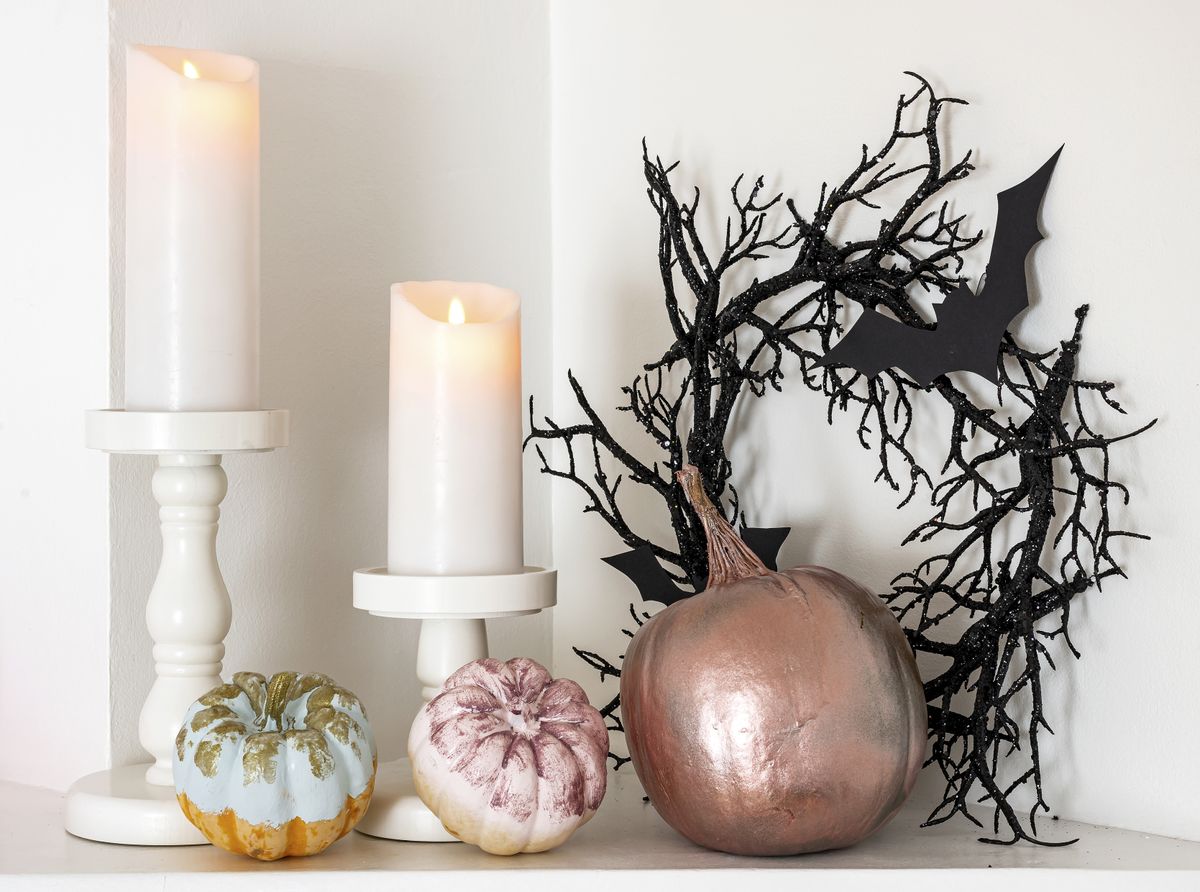
Whether you're creating a minimal or marvelous spooky display this year, painting pumpkins will add more personality to your Halloween decorations. They could even complement your home's interior design...
You will need:
- Pumpkins
- A cloth
- Warm water
- Newspaper
- Paint of pick (spray or not)
- Paintbrushes
- Decorative additions of choice: glitter, foliage etc.
Lauren Hoyal-Mitchell, the Brand & Creative Lead at Hobbycraft means how 'Pumpkin-carving is a classic when it comes to Halloween traditions, however for those eager crafters looking to add a spooky temperamental to their decoration, you can always get creative with paint.'
1. Prepare your pumpkin for painting
This will not be as messy as when carving a pumpkin but, you should lay some newspaper down anyhow to Definite up mess easily – especially if the kids are portions out!
First you want to clean up your pumpkin properly to catch any dust, debris and grit as this could stop the paint sticking to the skin, resulting in less than pro-looking results. For this, simply grab some warm water with a small dish soap and use your cloth to gently rub off any grime. Do not over-soak the pumpkin and next, you'll want to let your pumpkin fully dry.
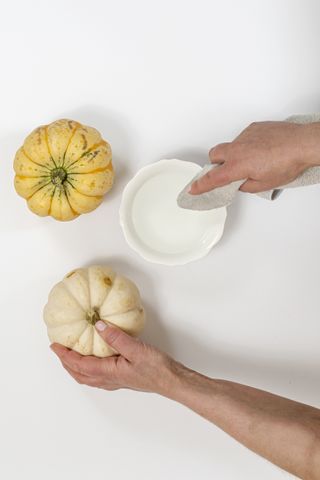
(Image credit: Rust-Oleum)
2. Start painting
'Once clean, you can begin letting your imagination flow!' Says Hoyal-Mitchell.
We've used Rust-Oleum's Chalky Finish Furniture Paint for this DIY in the intellectual Duck Egg. Start by simply painting your pumpkin for the attain you're after, there's no need to prime the surface.
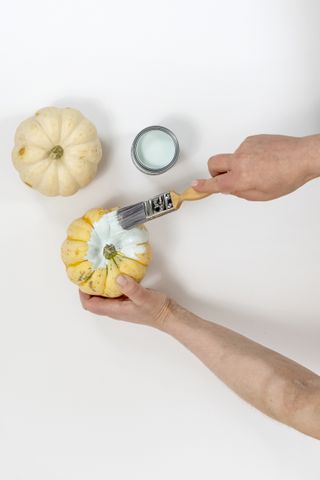
(Image credit: Rust-Oleum)
3. Leave your pumpkin to dry
If you're building on a acquire, whether you use spray paints or not, acrylic or water-based paint, be sure to let your first layer dry by you go in with another color or any finer detail. You should check the drying time on the paint you've bought.
4. Get creative
For the next step, you might want to spray paint spanking gourd or a dried one for an ombre attain. When using spray paint, ensure you do this in a well ventilated spot. Spray one, misting the areas you'd like to work on, interpretation up the coverage.
For this DIY, you want to use Rust-Oleum Chalky Finish Spray Paint in China Rose and you'll only want to paint the bottom half of your gourd.
But you can go freehand with a finer paint brush or even cut out sponges to add simple patterns and textures.
Let your creations dry once again.
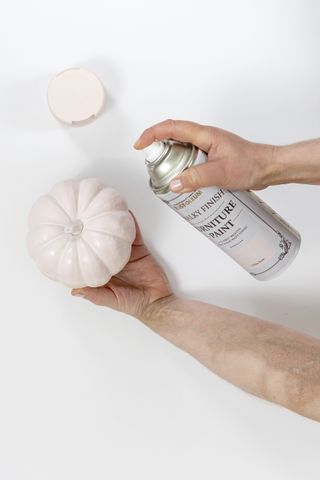
(Image credit: Rust-Oleum)
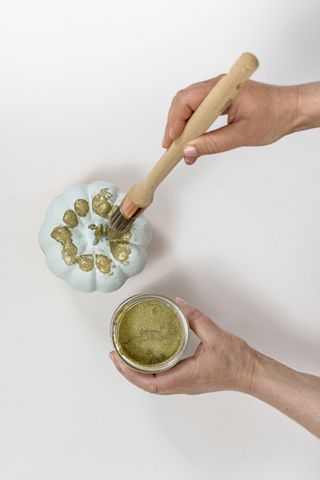
5. Add more decorative detail
Next, we've used glitter paint to add a small more pizzazz to our pumpkins but this is your chance to go to town with different pumpkin decorating ideas. Stripes and polka dots are easy enough to add freehand or with a stencil, while if you want a more designer-esque finish, pick up a thin paintbrush and see where your inner artist takes you.
(Image credit: Rust-Oleum)
How do you current a pumpkin for painting?
Hoyal-Mitchell highlights 'Preparation is key in ensuring you uncompleted your painting project and achieve the perfect presentation. First things gracious, you must wash your pumpkin before you start on your crafts. Use a cloth and soap and water to help you acquire any dirt and give you a cleaner surface for your creative designs.'
What kind of paint do you use on a pumpkin?
Hoyal-Mitchell says 'For a unbelievable finish to your creepy creation, it is best to use acrylic paint instead of oil-based alternatives. Acrylic is a quick-drying option which can be just wiped off if you have any misjudged strokes or fabricate disasters.' For the above DIY we used Rust-Oleum's water-based paint which is virtually odorless and sticks to almost any surface.
Can you paint level onto a pumpkin?
Once clean, yes you can. For best results Hoyal-Mitchell says 'You'll need to apply approximately coats of paint to ensure all areas are covered, and we'd recommend picking a color with a high opacity to help enact this. The design possibilities on a pumpkin are endless – whether you want to paint on a face, spooky fabricate, abstract pattern or a 'trick or treat' vinyl slogan.'
Those trick-or-treaters are in for a cute surprise.
*With special thanks to Rust-Oleum for their DIY.
Source


Comments
Post a Comment